You have a design in your head. Your manufacturer needs it on paper, precisely enough that a stranger on a factory floor can build it without guessing. Most first-time brand owners send a mood board or a hand-drawn doodle and wonder why the sample comes back wrong. This guide gives you the exact steps to build fashion flats that a US manufacturer can read and quote from, the first time.
They are the single most important visual document you hand to a factory before your tech pack goes any further. Get them wrong, and every downstream step, from costing to sampling, inherits the ambiguity. Get them right, and your manufacturer can price accurately, source correctly, and build your first sample close to your vision.
This guide covers what a fashion flat actually is, why factories misread them, and the exact steps to draw one a manufacturer can act on without calling you to ask what you meant. By the end, you will have a repeatable process for building fashion flats you can reuse for every style in your line.
Step 1: What Is a Fashion Flat, and Why Does It Matter?
A fashion flat is a 2D technical line drawing that shows a garment as if it were laid flat on a table, with no shading, no color, and no styling. For clothing brands, this means the difference between a manufacturer who understands your design at a glance and one who has to guess at proportions, seams, and construction.
Fashion flats are different from fashion illustrations. An illustration sells the mood of a garment on a stylized body. A flat sells the construction to a factory. Solid lines mark seams and stitching, proportions are accurate to how the garment will actually sit, and nothing is left to artistic interpretation.
According to the American Apparel and Footwear Association, production miscommunication between brands and factories is a recurring cause of delayed launches for emerging apparel businesses. The mechanism is simple: a cutting room builds to the measurements and lines it can see on the page, not to the design intent in your head, so an ambiguous flat gets converted into whatever interpretation is fastest for the factory to produce.
For more on how a flat feeds into your full production document, see What Is a Flat Sketch?
Step 2: Choose Your Tools and Set Up Your Files
You do not need professional design training to produce usable fashion flats, but you do need the right tool for your stage.
- Adobe Illustrator is the industry standard for building them. Most US manufacturers expect vector files (AI or exported PDF) because they scale without losing line precision.
- Free and low-cost flat-sketch tools with pre-built garment templates work well for a first collection if you are not ready to invest in Illustrator.
- Freelance technical designers typically charge $50 to $150 per garment for a single accurate flat if you would rather commission the drawing than build it yourself.
The SCORE small business resource center advises new founders to weigh the cost of outsourcing technical work like this against the time it would take to learn it themselves, especially when a single flat feeds every future season of a hero product.
Set up one file per style, and build a template layer system (silhouette, construction lines, callouts, color) so every future flat follows the same structure. A Denver-based denim brand cut its per-style flat production time from several hours to under 45 minutes once it standardized a template across its first six styles.
Step 3: Draw Accurate Proportions and Silhouette First
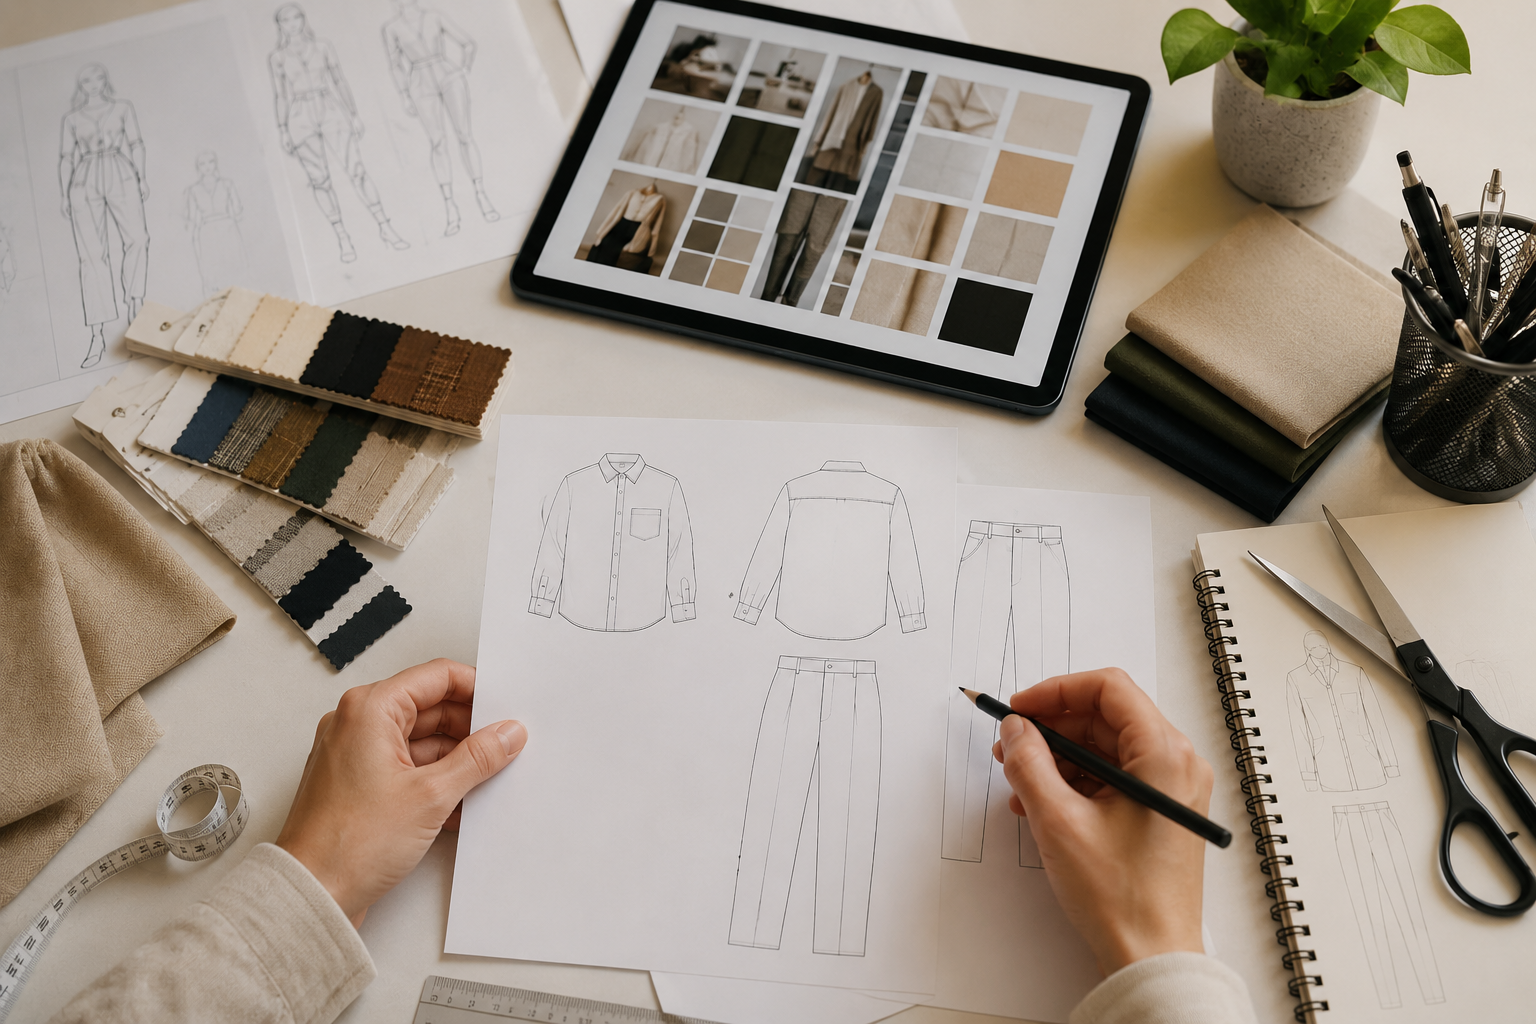
Silhouette accuracy is the foundation of a usable fashion flat, because every measurement and construction detail a manufacturer adds later depends on the base proportions being correct.
Start building your fashion flats with the garment’s outline exactly as it will hang: body length, shoulder width, sweep, and overall shape (fitted, semi-fitted, boxy, A-line). Draw both front and back outlines before adding any detail. If you are working from a reference garment, trace its proportions rather than estimating by eye.
Common proportion mistakes that cause bad first samples:
Mistake | What Happens at the Factory |
Sleeve length drawn too short relative to body | Pattern maker grades the sleeve incorrectly across sizes |
Neckline drawn asymmetrically | Factory has to guess which side is accurate |
No indication of ease or ratio to body | Fit comes back tighter or looser than intended |
Silhouette drawn at an angle instead of flat | Measurements taken off the sketch are distorted |
If your design includes fashion flats for women’s tops or dresses with fitted waists, pay particular attention to waist suppression and dart placement. These small proportion details change fit outcomes more than any other single element on the sketch.
Step 4: Add Construction Lines, Stitching, and Seam Details
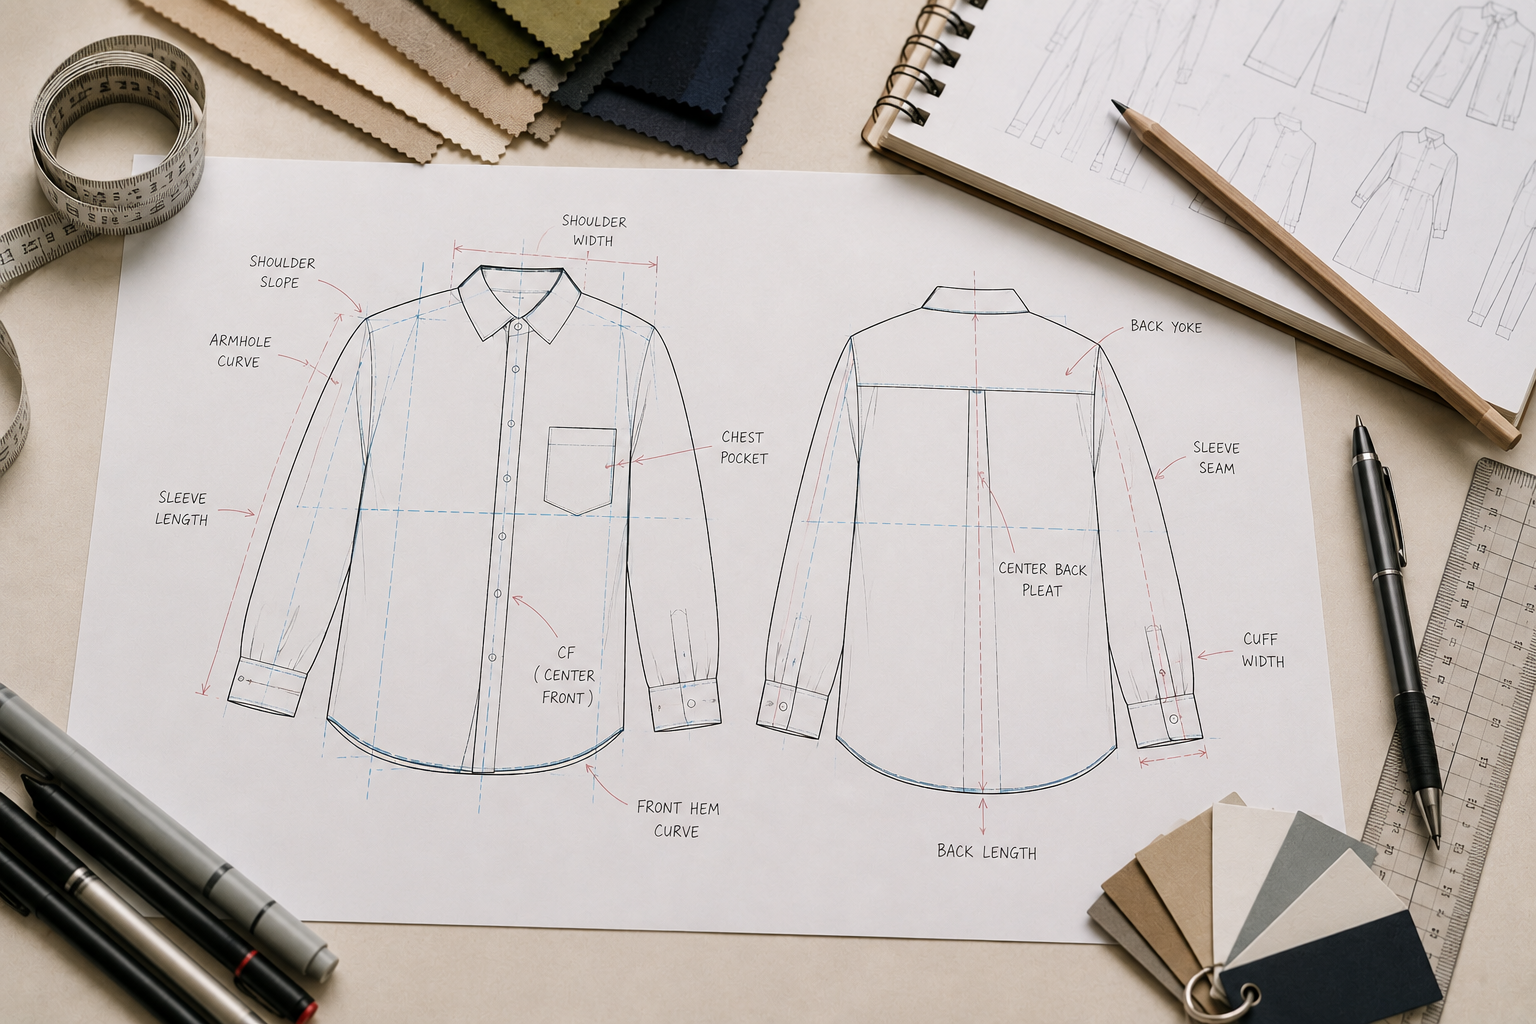
Construction lines tell the factory exactly how the garment goes together: every seam, every stitch type, and every fastener, drawn with solid lines once your silhouette is set. This is the step most beginners rush when building fashion flats, and it is the step that causes the most expensive sample corrections.
Cover these elements explicitly:
- Seam lines: every place two fabric pieces join
- Stitch lines: topstitching, edge stitching, and decorative stitching, drawn separately from structural seams
- Fasteners: buttons, zippers, snaps, drawn at their exact placement, not implied
- Pockets, collars, and cuffs: drawn as separate detail sketches if the main flat gets too crowded
Do not leave a design element undrawn because you assume the factory will “figure it out.” An incomplete flat becomes a decision the factory makes for you, and it is rarely the decision you would have made. Your flat becomes the visual core of your tech pack, the complete technical document that also includes measurements, materials, and construction notes for a manufacturer to quote and produce from. For a deeper walkthrough of building the rest of that document, see How to Make a Professional Tech Pack on Your Own.
Step 5: Annotate Fabric, Trims, Colorways, and Callouts
Fashion flats without annotations are only half a document. Add callout lines pointing to each construction element with a short label: fabric type, trim, stitch type, or finish.
A colorway is the specific set of color and material references assigned to a single style, communicated through Pantone or fabric-mill codes rather than descriptive names. Never write “navy” or “dusty rose” without a Pantone reference. A manufacturer working from a color name alone makes a judgment call, and that judgment call is one of the most common causes of sample rejection on reorders.
Annotate at minimum:
- Fabric type and weight (for example, “180gsm cotton jersey,” not just “cotton”)
- Trim specifications: zipper length and style, button size and material, drawcord composition
- Pantone or dye reference for every colorway
- Label and hang-tag placement, measured from a reference seam in inches or millimeters
Step 6: How Many Views Does a Manufacturer Need?
Most manufacturers need at minimum a front view and a back view for every style of fashion flats, plus a detail view for any construction element too small to read clearly on the main sketch.
View | When It’s Required |
Front | Every style, no exceptions |
Back | Every style, no exceptions |
Side profile | Fitted or structured garments where drape matters |
Detail close-up | Pockets, plackets, closures, or embroidery placement |
Interior view | Lined garments, or any construction hidden from the outside |
Skipping the back view is one of the most common omissions in first-time fashion flats, and it is also one of the fastest ways to receive a sample with an unintended construction choice on the back panel.
Also Read: Tech Pack Clothing: What It Is and How to Create One →
Step 7: Pair Your Flats With a Spec Sheet and Send Them to Manufacturers
A flat sketch alone is not a complete production document. Pair it with a measurement spec sheet, a chart of every point of measurement for your sample size, graded across your full size run. Together, the flat and spec sheet form the sketch-and-measurement core of your tech pack.
Once your flats and spec sheet are ready, the next bottleneck for most brand owners is finding a manufacturer who will actually read them carefully. Maker’s Row is a marketplace connecting apparel brand owners with verified US manufacturers, and factories on the platform are used to working from complete technical documents.
Find Manufacturers Who Work From Complete Flats on Maker’s Row
Finding a manufacturer who takes your technical documents seriously does not have to mean months of cold emails. On Maker’s Row, post your project for free and attach your fashion flats and spec sheet directly to your brief. Verified US manufacturers who work with your garment type respond directly, often within 24 to 48 hours, and quote against the same document instead of guessing from a description.
Before you reach out, confirm your documentation is complete using the Clothing Manufacturer Readiness Checklist, and review how to find a clothing manufacturer in the USA if you have not shortlisted factories yet.
FAQs: Fashion Flats for Manufacturers
A fashion flat is a technical, unshaded line drawing built for manufacturing accuracy, while a fashion illustration is a stylized image built to sell the mood of a design. Manufacturers work from flats because illustrations do not communicate seam placement, proportion, or construction detail precisely enough to build a pattern.
No. Illustrator is the industry standard because it produces clean, scalable vector files, but you can start with free flat-sketch templates or a freelance technical designer if you are not ready to invest in software. What matters to a manufacturer is accuracy, not which program produced the file.
A quotable flat needs an accurate front and back silhouette, all seam and stitch lines, fastener placement, and basic fabric and trim callouts. Manufacturers can quote a rough estimate from less, but the price will change once full detail is added, so incomplete flats often lead to a second, more accurate quote later.
Some manufacturers offer design assistance, but most expect you to arrive with a flat already prepared. Development-focused factories are more likely to help; production-only factories generally are not equipped for it.
Leaving out the back view or omitting fastener and seam detail is the most common mistake. Both omissions force the factory to guess, and guesses rarely match the brand owner’s original intent.
The line drawing itself generally qualifies for automatic copyright protection as an original work once it is fixed on paper or in a digital file, without needing to register it. The garment’s overall shape or ornamental appearance is a separate matter and may require a design patent through the USPTO if you want to prevent others from producing a visually identical garment. For day-to-day protection when sharing files with a factory, see How to Protect Clothing Designs for practical steps like NDAs and limited sharing.
A freelance technical designer typically charges $50 to $150 per style for an accurate flat sketch, depending on construction complexity. The SBA recommends documenting supplier specifications, including technical drawings, before sourcing begins, since incomplete documentation is a common source of costly revision cycles for new product businesses.
Your Fashion Flats Are the First Step Toward a Real Sample
With your fashion flats ready, your clothing brand is one manufacturer away from becoming real. The factories are on Maker’s Row, ready to bid on your project.